As a business owner in Nigeria, writing paper receipts by hand wastes valuable time. It slows down the checkout line when customers are waiting impatiently at your shop or pharmacy counter. You also risk making calculation errors or losing track of your daily sales records. Customers today prefer clear and professional invoices.
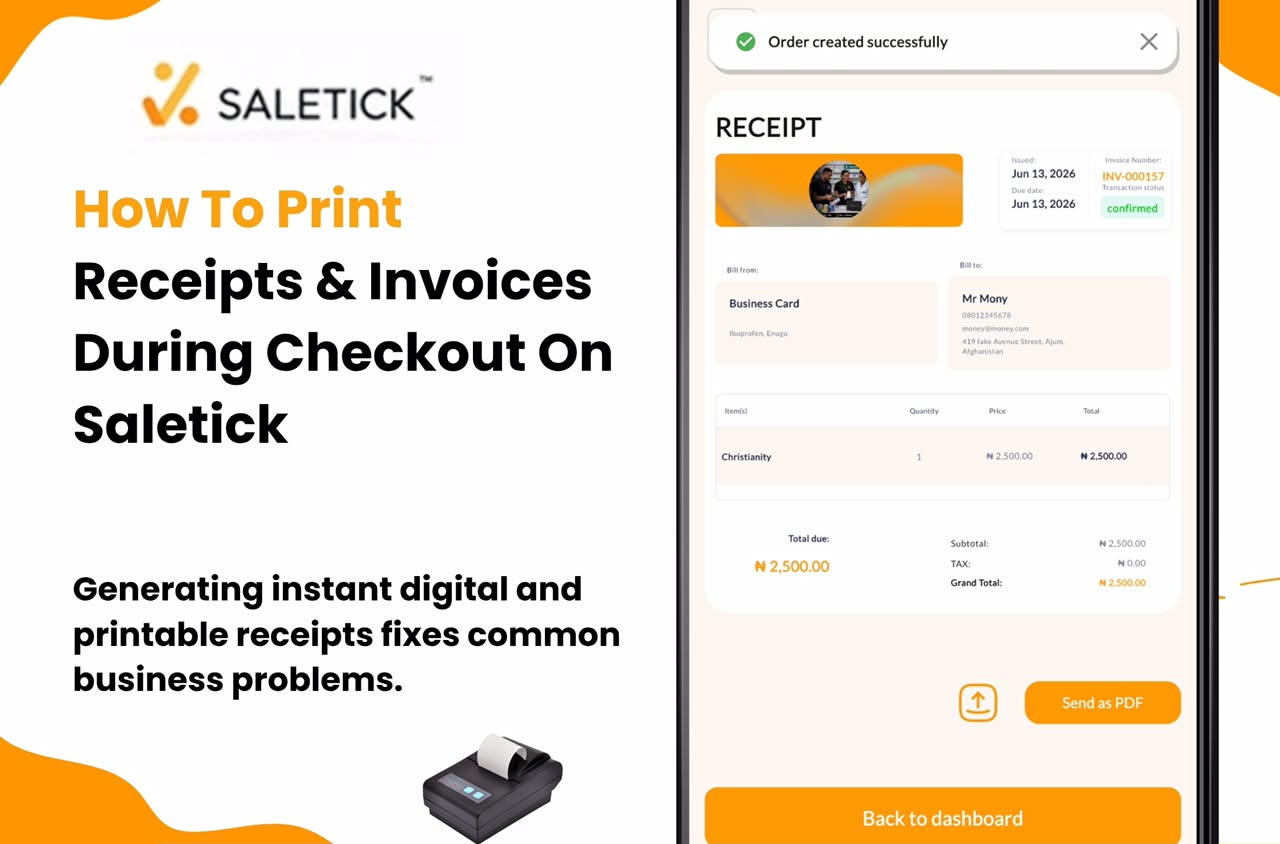
Generating instant digital and printable receipts fixes these common business problems. This guide shows you exactly how to process sales and generate invoices instantly using the SaleTick app. Please Note that checkout can only be done by the Branch Manager, POS Staff or Account Staff account. An Administrator account cannot process Sales
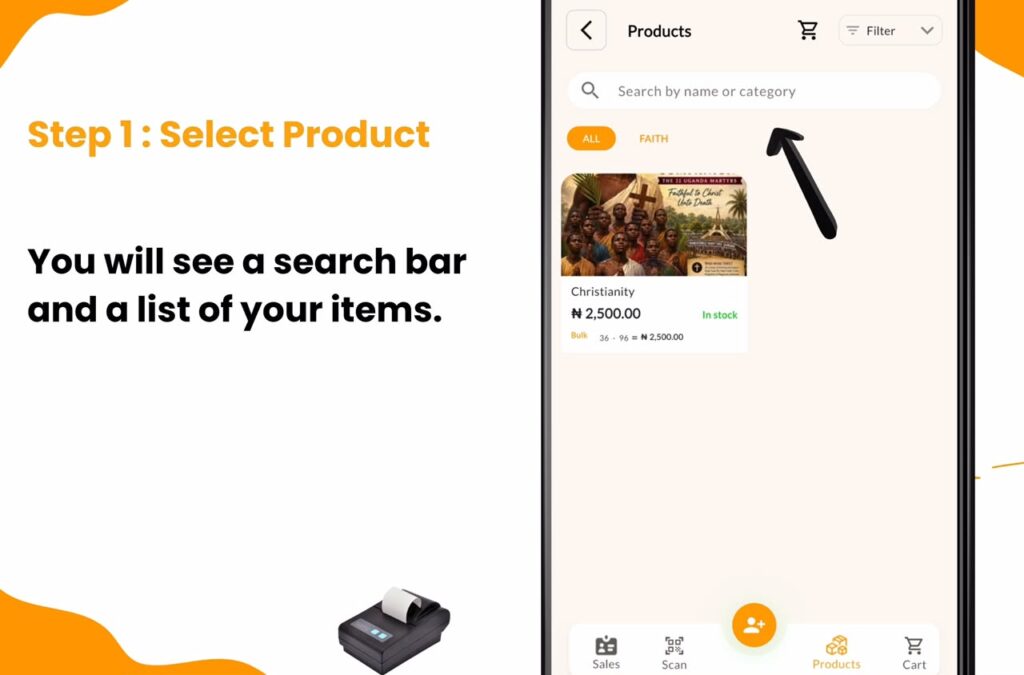
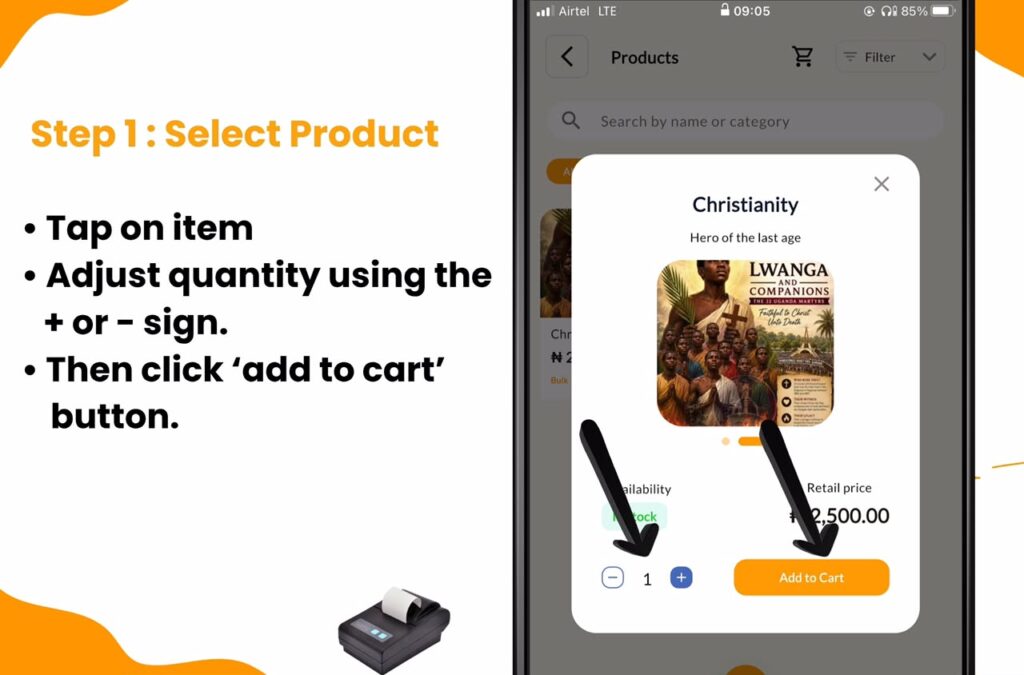
Step 1: Select the Product
Make sure your printer has first been connected by Bluetooth or through USB cable and then open the SaleTick Branch Manager or POS staff account and navigate to the “Products” screen.

You will see a search bar and a list of your items.
Tap on the specific item your customer wants to buy. Adjust the quantity using the plus or minus buttons, then click the orange “Add to Cart” button.
Better still you can scan using an external barcode scanner or device scanner to instantly add products to Cart. For details on using barcode scanner for Faster Checkout, read this article; How to Use Barcode Scanning for Faster Checkout on SaleTick.
Step 2: Proceed to Cart
Once the item is added, a red notification number will appear on your cart icon at the top of the screen.
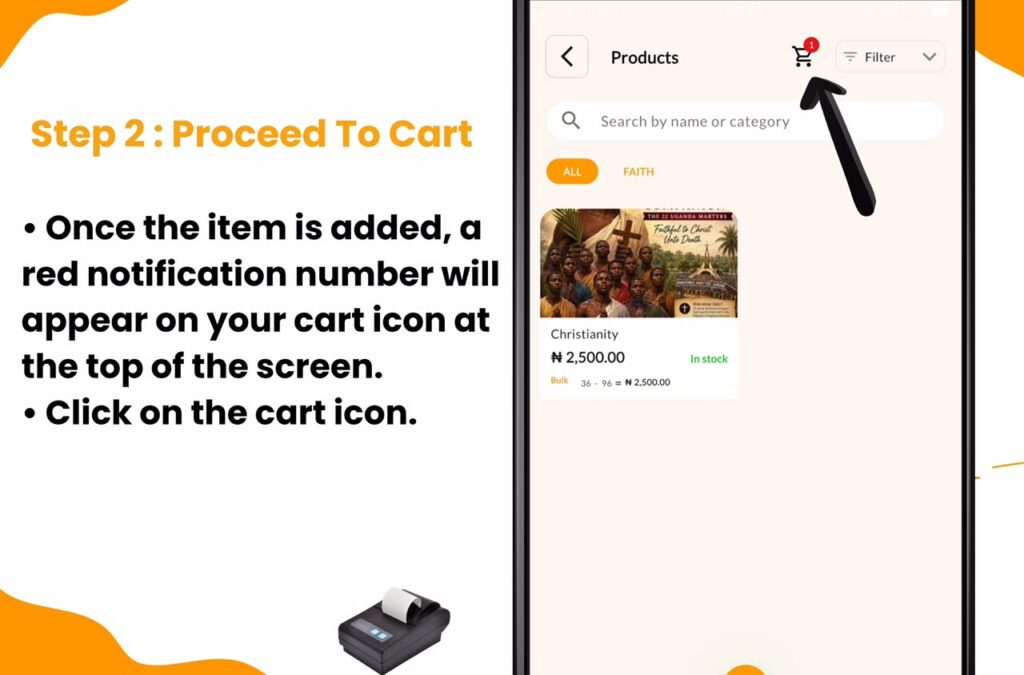
Click this cart icon to open the “Cart” page.
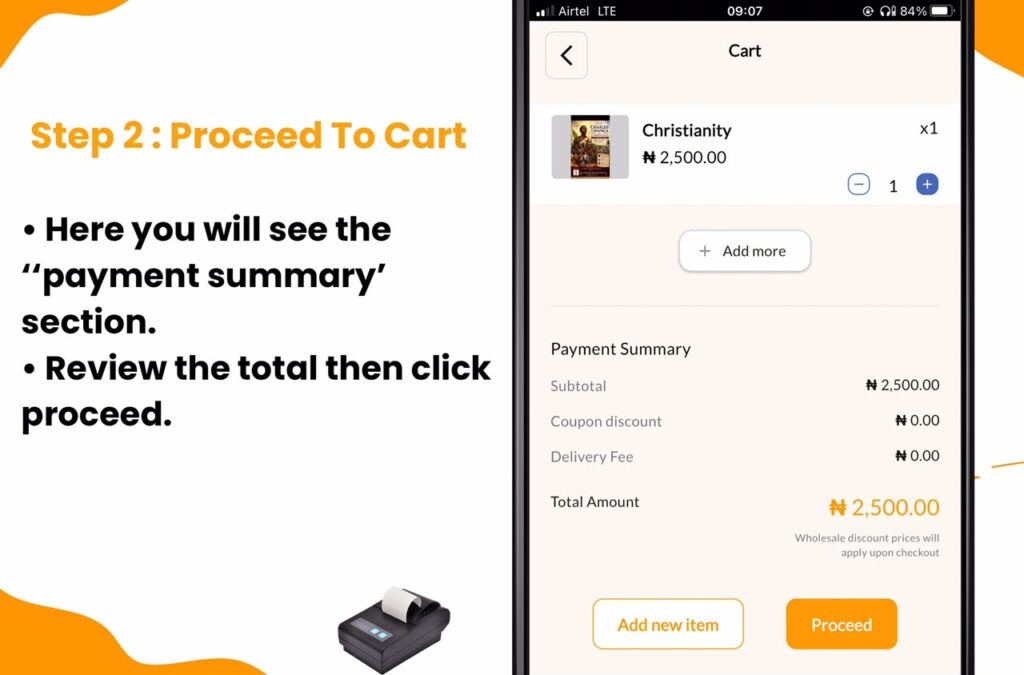
Here you will see the “Payment Summary” section. This section breaks down the Subtotal, Coupon discount, Delivery Fee, and the Total Amount. Review the total to ensure it is correct, then click the “Proceed” button.
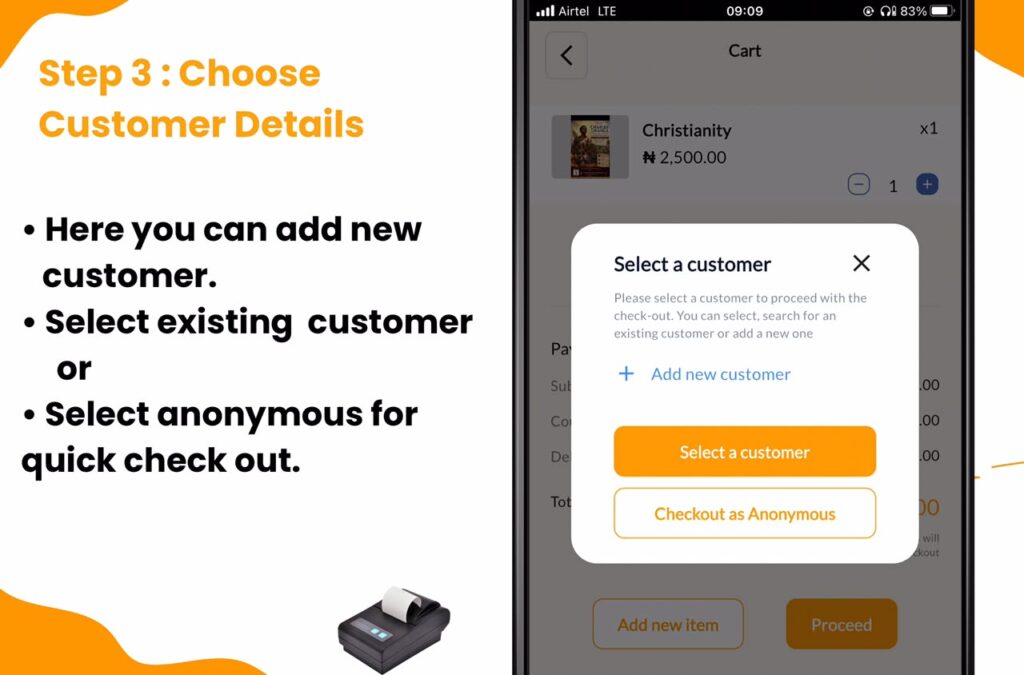
Step 3: Choose Customer Details
Next, a “Select a customer” popup will appear on your screen. You have three options here. You can click “+ Add new customer” to save their details for future marketing. You can click “Select a customer” to pick an existing loyal buyer. If the buyer is in a hurry and just wants to pay and leave, simply click “Checkout as Anonymous”.
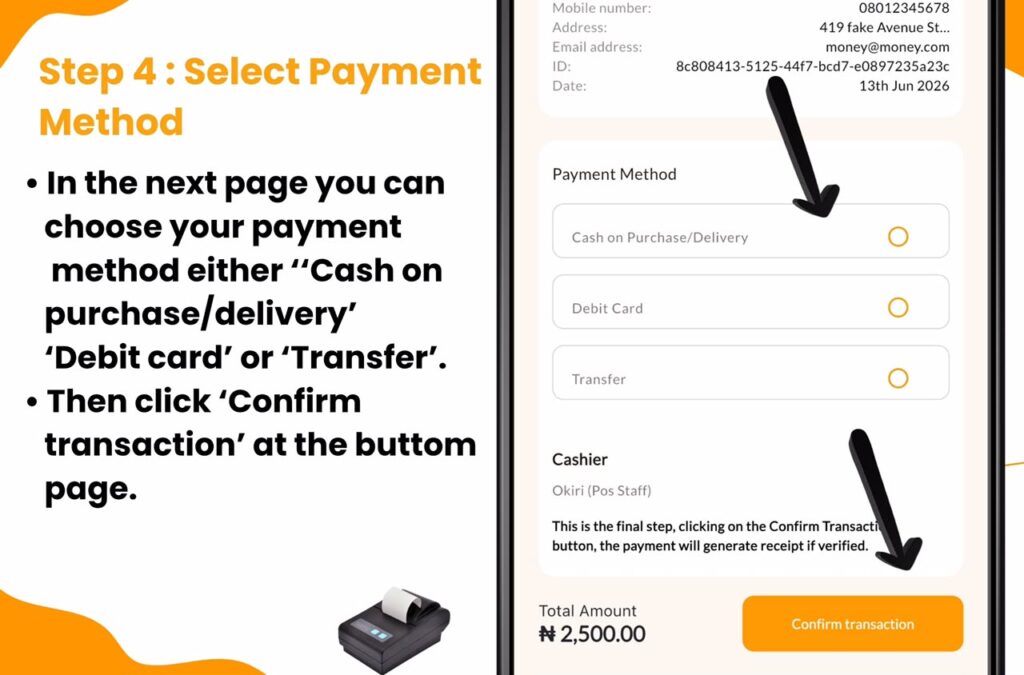
Step 4: Select Payment Method
You will now arrive at the “Summary” page. Scroll down to find the “Payment Method” section. You must choose how the customer is paying to keep your daily accounting accurate. Your options are “Cash on Purchase/Delivery”, “Debit Card”, or “Transfer”. Select the correct option, and click the “Confirm transaction” button at the bottom of your screen.
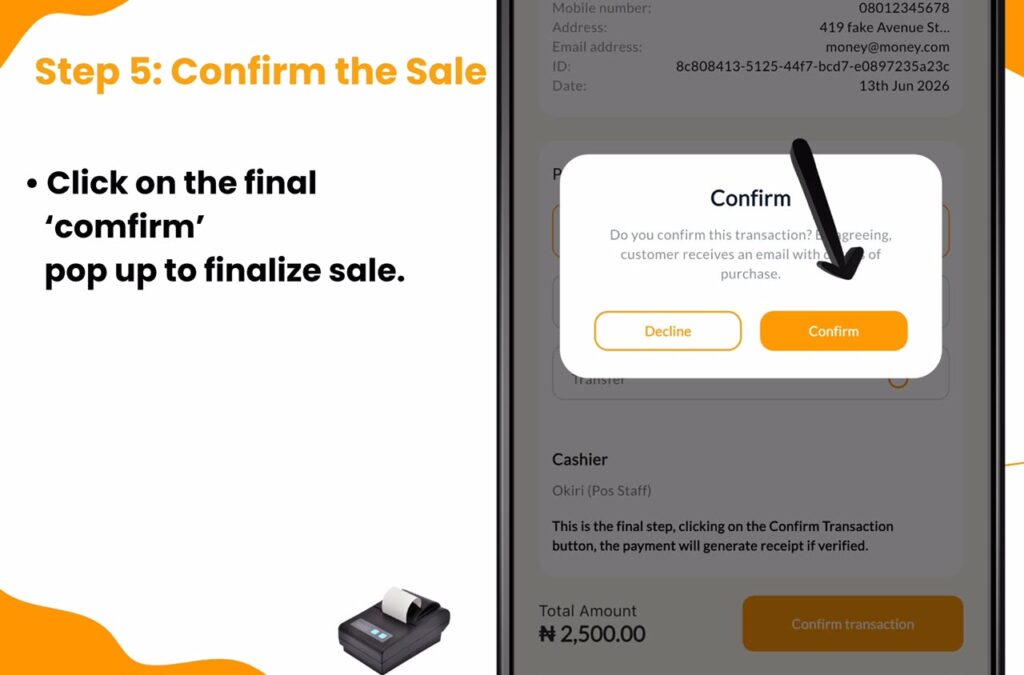
Step 5: Confirm the Sale
A final “Confirm” popup will ask “Do you confirm this transaction?”. The screen will also state that by agreeing, the customer receives an email with details of the purchase. Click the orange “Confirm” button to finalize the sale.
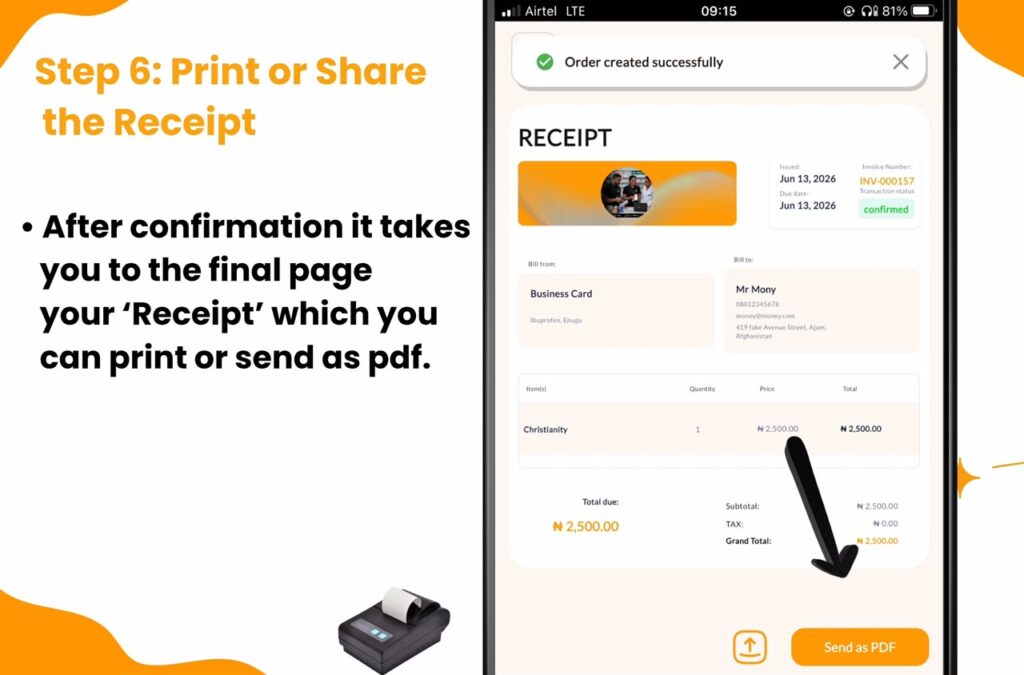
Step 6: Print or Share the Receipt
A green notification saying “Order created successfully” will appear at the top. The screen now displays the official “RECEIPT”. This invoice includes the Invoice Number, Date, Transaction status, and a full breakdown of the items and Total due. To give the customer their receipt, click the “Send as PDF” button to print out a copy via the either Bluetooth or USB connected printer or use the upload icon next to it to share it via WhatsApp.
After sending the invoice, click “Back to dashboard” to attend to the next customer in line.
See It In Action
Watch this quick video to see the full checkout process live on the app.
Giving customers clear invoices builds trust and keeps your inventory records highly accurate. SaleTick makes this entire process fast and completely stress free for supermarkets, pharmacies, and retail shops. If you are ready to speed up your checkout process and stop manual calculations, visit https://www.saletick.net/ to set up your business account today.